The following sequence explains how to gain access to and use the CourseLeaf Section Scheduler (CLSS) system.
CLSS Basics
Step 1: Getting Scheduling Access to CLSS
CLSS access is limited to individuals responsible for scheduling courses within their respective department or college.
To request initial CLSS edit access, complete the SIS Web Access Form.
Request Access> Request access privileges, select the following:
- Banner Access
- Banner PTA Access
- Class Roster/Electronic Grading
- Online Scheduling
Step 2: Log in to CLSS
Use this link to sign in to CLSS.
Log in using your Kerberos credentials.
If you experience difficulties accessing the CLSS system, it may be due to the absence of a CourseLeaf user account. Contact the Registrar Scheduling team to verify user account status.
CLSS contains historical, current, and future terms. Historical terms are archived as non-editable.
Step 3: Finding Scheduling Subject
Click on a term (instance) to open it, then locate the subject within the list of scheduling units. Only approved schedulers assigned to a subject have permission to edit its sections. To access the schedule, double-click on the unit line.

Step 4: Subject Home Screen
The top navigation displays the current term and subject you are working on. Click on the term to return to the list of subjects or select CourseLeaf/CLSS to navigate back to the CLSS instance homepage.

Below the top navigation, the display shows the total number of courses scheduled for the subject and the number of individual sections. Additionally, it indicates the current Phase and Mode of your schedule.

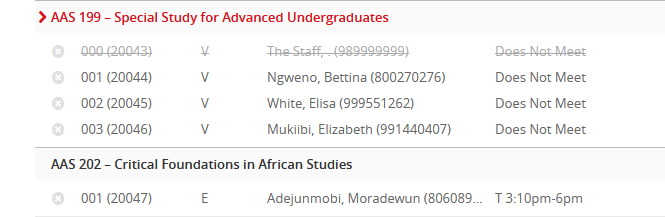
Each course shows the subject and the catalog title

The scheduling unit screen shows a list of courses with existing sections. To view sections of the course, double-click on the course shell. In the image below, AAS is the course shell, and the sections are nested below, each displaying the Section, CRN, instruction type, instructor, and schedule.
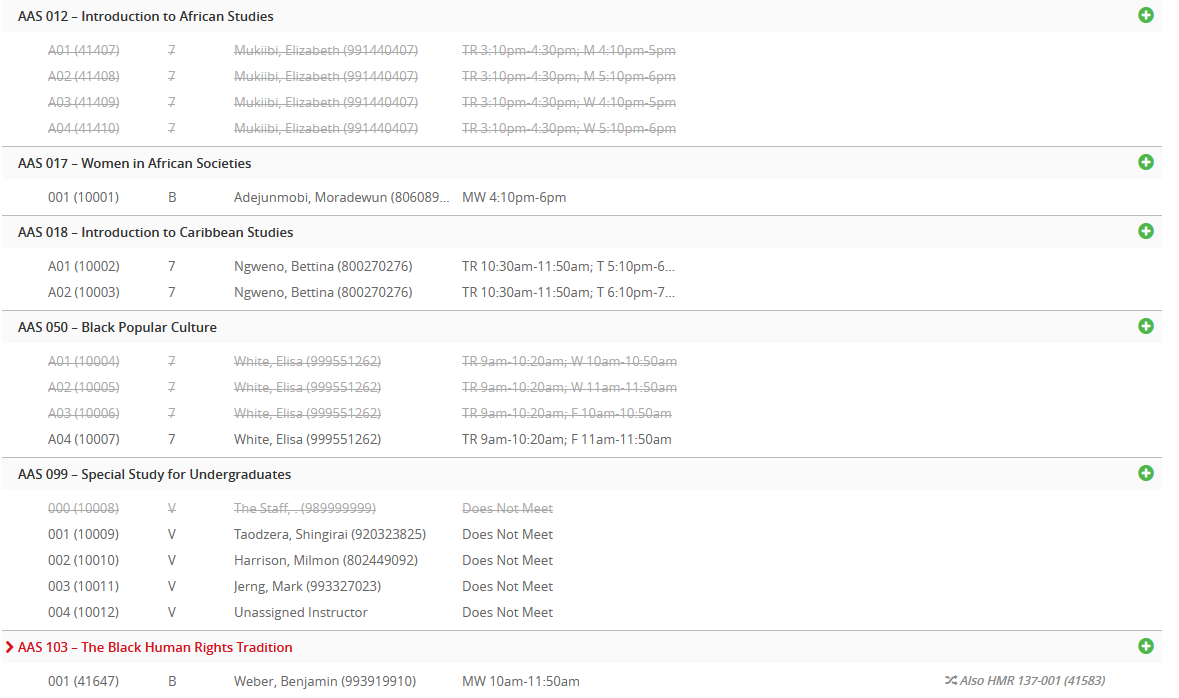
To expand all courses with scheduled sections, click the opposing arrows near where the number of courses and sections in the subject are displayed. The uniting arrows next to it will collapse all the lines again.

To view all active courses available to a scheduling subject, including those without sections, check the box labeled “Show courses with no sections” in the top right corner.

Double-click on a course to view all scheduled sections. Section number, CRN, schedule type, instructor, meeting pattern (schedule), subject title, and cross-lists will be shown. If the cross-lists start with “See”, that means that this section is the parent (controlling) section. If the cross-list starts with “Also”, it means it is the child section.
Double-click a section to open the scheduling form to view or edit an existing class.
Click the green plus sign to the right of a course to add a new section.
Step 5: Viewing a Section
Double-click on a course to view all scheduled sections. Section number, CRN, schedule type, instructor, meeting pattern (schedule), subject title, and cross-lists will be shown. If the cross-lists start with “See”, that means that this section is the parent (controlling) section. If the cross-list starts with “Also”, it means it is the child section.
Double-click a section to open the scheduling form to view or edit an existing class.
Click the green plus sign to the right of a course to add a new section
Step 6: Adding a New Section
Click the green plus sign to the right of a course to add a new section. The Create Section (schedule form) will appear.

Details for completing each field are in the “Adding a Section” of the scheduling manual (Detailed instructions)
Step 7: Validate and Submit in Design Mode
If submitting a schedule for the first time, click “Validate” to complete the submission. The Scheduling team and approvers will not be able to see the schedule unless this step is completed. Additionally, new sections or changes to existing sections will not be sent to Banner unless they are validated. If the schedule is rolled back for any reason, validation must be done again.

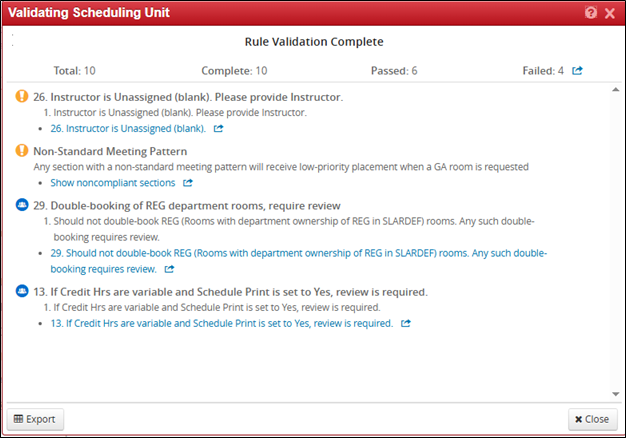
Once CLSS runs its rule validation process and all errors have been fixed, if any, a button called Start Workflow will appear. Click it to send the schedule to the Scheduling Team and Approvers.

Once approved, the schedule will switch to Refine Mode.